
Quick and Easy DIY Fixture Repairs: Fixing Leaky Taps and Dripping Toilets
Drip, drip, drip.
The constant sound of a leaky tap or a dripping toilet can be incredibly annoying. It can also lead to water wastage and potential damage if left unresolved.
Fortunately, you do not always need to be a plumbing expert to tackle these common household issues. With a few basic tools and a bit of know-how, some minor repairs may be manageable at home.
In this guide, our plumbers in Burwood will walk you through the steps to repair leaky taps and dripping toilets, helping you save both water and money.
Tried the quick fix but still have a leak? Call Doherty Plumbing Solutions on (03) 9877 5775 for reliable tap and toilet repairs.
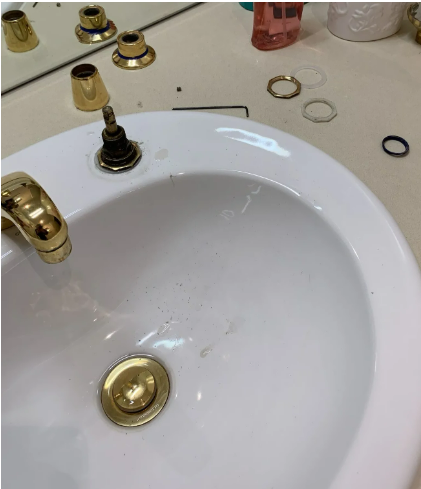
Tools and materials you’ll need
Before we dive into the repairs, it’s a good idea to gather the necessary tools and materials.
For repairing leaky taps:
- Adjustable wrench
- Replacement washers and O-rings
- Screwdriver, usually Phillips or flathead
- Allen key, depending on tap handle type
- Plumber’s tape, also known as Teflon tape
- Towels or rags
- Small container or bowl
For fixing dripping toilets:
- Adjustable wrench
- Screwdriver or Allen key
- Toilet inlet valve replacement kit, optional
- Toilet tank repair kit, optional
- Bucket or large container
- Rubber gloves
Now that you have your tools and materials ready, let’s get started with the repairs.
Fixing a leaky tap
Step 1: Turn off the water supply
Locate the shutoff valves, if any, under the sink and/or turn off the water supply to the tap you’re going to repair.
If there are no individual shutoff valves, you may need to temporarily shut off the main water supply to your home.
If you have separate taps for hot and cold water, make sure to turn off both supplies.
Step 2: Prepare your work area
Place towels or rags under the sink to catch any water that may spill during the repair.
It’s also a good idea to have a small container or bowl handy to collect small parts like screws and washers.
Step 3: Remove the handle
Use a screwdriver to remove the screw that holds the tap handle in place.
Once the screw is removed, carefully take off the handle.
Step 4: Access the cartridge or tap spindle
Depending on your tap’s design, you’ll either find a cartridge, tap spindle, or mixer cartridge.
Use your adjustable spanner to loosen and remove it.
If replacing a mixer cartridge, remove the cartridge retaining nut, remove the cartridge, install the new cartridge, and reinstate the tap handles.
Be careful not to damage the threads during removal.
Step 5: Replace washers and O-rings
Inspect the washers and O-rings for signs of wear, cracks, or damage.
If you see any issues, replace them with new ones from your replacement kit.
Apply plumber’s tape to the threads of the tap spindle or cartridge for a better seal.
Step 6: Reassemble the tap
Carefully reassemble the tap components in the reverse order you removed them.
Make sure everything is snug, but not over-tightened.
Step 7: Turn on the water supply
Turn the water supply back on slowly and check for any leaks.
If everything looks good, give the tap or taps a few turns to ensure all is functioning properly.
Fixing a dripping toilet
Step 1: Turn off the water supply
Locate the toilet’s shutoff valve, usually located behind or beneath the toilet cistern near the floor.
Turn it clockwise to shut off the water supply.
Step 2: Empty the tank
Remove the toilet tank lid and flush the toilet to empty the tank.
Use a sponge or towel to soak up any remaining water in the tank and bowl.
Step 3: Identify the cause
There are typically two common causes of a dripping toilet: an outlet valve issue or an inlet valve issue.
Let’s address both scenarios.
For an inlet valve issue
Check the inlet valve for any visible signs of damage or wear.
If the inlet valve is old or damaged, consider replacing it with a new one from a toilet tank repair kit or cistern inlet valve.
Follow the manufacturer’s instructions for installing the new inlet valve.
For an outlet valve issue
Lift the flush valve seal to unhook it from the flush lever.
Remove the old flush valve seal and replace it with a new one from your replacement kit.
Reattach the seal to the flush lever, ensuring it has enough slack to allow proper sealing when not in use.
Follow the manufacturer’s instructions for installing the new fill valve.
Step 4: Turn on the water supply
Turn the shutoff valve counterclockwise to gradually restore the water supply to the toilet tank.
Step 5: Check for leaks
Allow the tank to fill, and keep an eye out for any leaks around the inlet fill or outlet valves.
If you notice any leaks, adjust the valve as needed.
Step 6: Test the toilet
Flush the toilet several times to ensure it’s working correctly and that there are no more drips.
When to call a professional plumber
If you’re unsure about any step or encounter unexpected difficulties, it’s always a good idea to consult the manufacturer’s instructions for your specific tap or toilet model.
If the issue persists after attempting these DIY repairs, or if you’re uncomfortable with the process, don’t hesitate to call the professional plumbers at Doherty’s.
Some plumbing problems may require more advanced troubleshooting and repair.
Regular maintenance and prompt issue resolution can save you money on water bills and prevent further damage to your fixtures and plumbing system.
Our team of skilled, licensed plumbers is ready to fix urgent or recurring plumbing issues that DIY methods haven’t resolved.
Get the plumbing problem fixed right the first time. Ongoing issues can lead to much larger and more serious problems.Call Doherty Plumbing Solutions today on (03) 9877 5775 or submit an online enquiry.